If you’re a builder, developer, or project manager who’s seen one too many “surprises” on site, you know that good water planning isn’t optional. It’s a discipline. Early decisions about capacity, placement, and connections save grief, costs, and call-backs. If you want a quick pointer to reliable references, check this useful resource on water tank options for builders. It’s the sort of practical guide that helps match design intent to installation reality.
Start with the brief, not the tank
Too many projects begin with a product in mind and then shoehorn it into the plan. Instead, start with the brief. Ask: how will the property use water day-to-day? Domestic use, irrigation, concrete works, and passive fire protection – each has different demand profiles. Seasonal rainfall patterns matter. Soil type and site access matter. Council connections and subdivision conditions matter. Note them all down. You don’t need a spreadsheet at this stage, just a clear list so decisions later aren’t made by “whoever’s on site that week”.
A simple load estimate helps. Work out peak demand (kL/day) and likely storage days on tank (3–7 days is common for resilience). From there, tank capacity flows naturally. Don’t forget the roof catchment size if you’re harvesting rainwater, it’s the supply side of the equation.
Choose a tank type to suit the site and service life
You can’t just pick a water tank off a brochure and hope it fits the job. Every site throws its own curveballs: soil conditions, access, footprint, and client expectations. The tank that works perfectly on one project might be a headache on the next. The trick is to match the material and size to how the site actually behaves, not how it looks on paper.
Take polyethylene tanks, for example. They’re the go-to for tight suburban blocks because they’re light and can be rolled or lifted into position without heavy gear. Perfect when crane access isn’t an option. But once you get into larger capacities, that flexibility becomes a limit; they simply don’t scale as well.
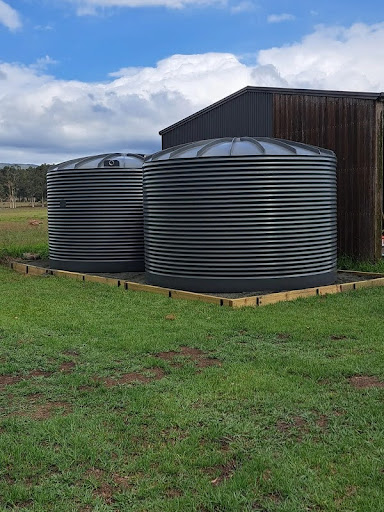
Then there are corrugated steel tanks, which are almost a staple across Australia. They’re tough, relatively affordable, and handle bigger volumes without breaking a sweat. Just remember, they need a properly prepared base and a bit of forethought near the coast, where salt air can shorten their life if you’re careless with coatings.
Concrete tanks belong in a different league. They’re heavy, yes, but that’s part of the point, they last. When you’ve got space underground or a solid slab ready, they’re an excellent choice for buried or semi-buried setups. Low maintenance, long lifespan, built to disappear and quietly do their job for decades.
And for those tricky, oddly shaped sites or temporary storage on construction jobs, flexible bladders and modular systems can be lifesavers. They slide into places no rigid tank could ever fit and can even move with the project if needed.
Choosing the right one isn’t about brand loyalty or guesswork. Overlay your storage capacity needs, delivery logistics, and the reality of installation and maintenance. If you specify a 10,000-litre steel tank and your site access only suits a small truck, that’s not a supplier problem; that’s a planning miss. The best builders get that right before the first concrete pour.
Location, location, location, and setbacks
Placement is often where the plan falls apart. Tanks must be accessible for maintenance, pumps, and overflow paths. Don’t bury pumps in dark corners. Leave space for future pump replacement and service access.
Check the development approval and local council guidelines for setback requirements. If the tank is a fire service component, it may have strict access and signage rules. Consider how the tank’s overflow is handled; you don’t want runoff dumping onto a neighbour’s driveway or the public footpath. Hardstand areas for maintenance vehicles and clear lines for pump suction and discharge should be shown on drawings, not decided on the day.
Foundation and install details that survive
A shoddy foundation creases a good tank fast. For steel and large poly tanks, a compacted crushed rock pad or reinforced concrete slab is standard. Soil tests? If there’s risk of subsidence or soft ground, call in the geotech. Don’t assume you can fix a sinking tank later.
Plumbing: oversized pipes reduce friction losses. Use above-ground service lines where frost or maintenance access is a concern. For buried pipework, consider inspection points and isolation valves. Label everything. It saves hours later.
Pump selection is not trivial. Match the pump curve to the demand and available suction head. Specify a pressure tank or variable speed drive if you expect variable flows or multiple points of use. Electrical supply, ensure the builder coordinates with the electrician so that controls, isolators and alarms are properly placed.
Compliance, health and backflow
You’ll hear about cross-connection control a lot, and with good reason. Where harvested rainwater interfaces with potable systems, the right backflow prevention is non-negotiable. There are Australian Standards and local water authority rules to follow. Make compliance part of the specification. Don’t leave it to the subcontractor to “figure out”.
If the tank is used for potable supply, specify filtering, disinfection and a maintenance regime. If it’s for non-potable uses, signage and valve arrangements must prevent accidental connection to drinking lines. Include access for inspection and cleaning in the design.
Fire water and reserve strategies
Many new homes and estates now need to consider fire water storage. That’s a different animal: required capacity, dedicated outlets, access for fire services, and often separate connections that must be independent from domestic uses. If you’re planning fire water on a project, map out priority access and agree it with the local fire authority early. Don’t mix domestic drawdown with fire reserve unless regulations allow it, and document the control strategy.
Sustainability and lifecycle thinking
Yes, initial cost matters. But builders who think beyond first cost usually win in the long term. Choose materials and placements that minimise maintenance and maximise life. Consider these low-effort wins:
- Oversized gutters and debris screens to reduce cleaning frequency.
- Pre-filter leaf screens on downpipes to cut organics entering the tank.
- Locate tanks where they’re shaded if heat build-up is an issue.
- Specify venting and mosquito-proofing to avoid health issues and water quality deterioration.
Also, consider integration with stormwater management. Rainwater harvesting, when well designed, reduces runoff, helps with on-site detention, and can be a compliance plus for some councils.
Practical handover and maintenance schedule
A tank works well only if someone knows how to run it. At handover, provide the owner with a concise maintenance schedule: lid checks, first-flush systems, pump service intervals, filter cleaning and a note on winter procedures if relevant. Don’t hand them a 30-page manual. One page with clear actions at 3, 6, 12 months, then annually, is far more useful.
Make sure the owner knows where isolation valves are, how to bleed air from the system, and who to call for pump faults. If the project includes warranties, log serial numbers, dates of install, and supplier contact details.
Simple spec language to include on drawings
If you want to avoid ambiguity, add a short specification block on the drawings that covers:
- Tank type and capacity
- Foundation requirements
- Access and minimum clearance
- Plumbing sizing and backflow requirements
- Pump make/model performance or required flow/pressure envelope
- Maintenance access and first-fix provisions for conduits and electrical
That’s it. Tight, prescriptive, but not micromanaging. It keeps subcontractors honest.
Common mistakes I still see
- Putting tanks behind retaining walls with no room for service.
- Forgetting the overflow discharge path.
- Assuming a standard pump will suit all demands.
- No consideration for future scale, people add irrigation later.
- Vague spec language that invites cheaper, inappropriate alternatives.
Avoid those and you’ll cut the rework.
Final thought, integrate early, document clearly
Good water storage is about integration. It touches landscape, MEP, council conditions, and operational readiness. If you treat the tank as an afterthought, you’ll pay for it in snag lists. Treat it like a subsystem with clear spec, location, and access, and it just works.
If you want an authoritative builder-focused reference to pin to your specification, see this practical guide on water tank options for builders it’s the kind of resource I recommend when I’m specifying tanks and want things done right. Use it to check your assumptions, then make the decisions that suit your site.
Small final tip: put the tank on the drawings early and leave a note – “do not relocate without design review.” Save yourself the callbacks.